Curt Sofa system
The flexible modular sofa
$348
incl. 19% VAT plus shipping costs
incl. 19% VAT plus shipping costs
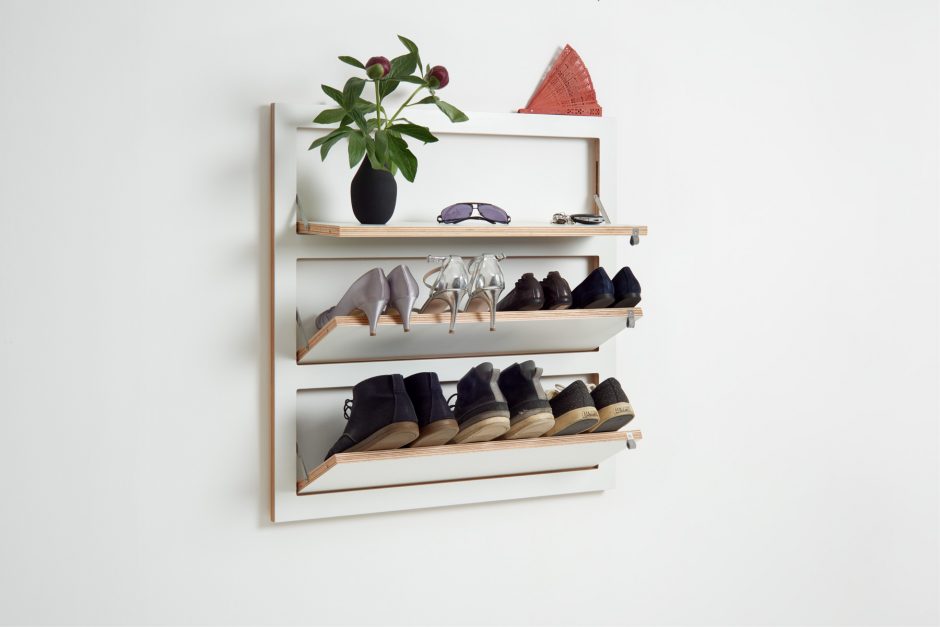
Especially in narrow entrance areas of big city apartments there is often only little space for a shoe cabinet. To put an end to mountains of shoes and tripping hazards, all Fläpps wall shelves with a shallow depth can now be transformed into a shoe rack with a simple trick. Practical and flexible storage space in a minimal area for shoes, purses and keys, Fläpps shoe racks offer that little bit of variety in narrow hallways. The wall-mounted shoe racks remain flexible even with the add-on and can be folded away or reused as a wall shelf as needed.


Material: multiplex birch, stainless steel
Surface: white - HPL dyed through,
black - HPL Traceless, edges oiled
Weight: 4,5 kg
Our products are not only characterised by infinite flexibility. Quality in workmanship and materials are our top priority. Our wood is FSC-certified and when it comes to metal, we only use stainless steel.
But the best thing is our through-coloured and matt HPL surfaces. These give our products a unique look and a velvety-soft feel.
Each Fläpps product comes with detailed assembly instructions. The assembly instructions also serve as a template for marking the top drill holes. The instructions also explain step by step how to install the Fläpps module on the wall.
1. ensure that the wall mounting is carried out professionally.
2. use only suitable wall mounting material for fastening. Check the load-bearing capacity of the walls.
3. Before drilling, it is essential to check and take into account the route of water and power lines.
4. Test whether the product is correctly attached before the first load.
5. Use Fläpps products indoors only.
6. Be aware of the risk of trapped fingers when folding.
Our HPL-coated surfaces are easy to clean and require no special care. Dust can be easily removed with a feather duster or a slightly damp cloth. Gentle cleaning agents can be used for heavier soiling. Ink, fruit and fibre pen stains, tea, coffee, red wine and mustard must be removed immediately, otherwise they will have a permanent effect on the surface.
Please never use products that apply material (e.g. waxes or oils), as these can yellow and resinify. You should also avoid using agents that break down material (e.g. harsh liquid cleaners, scouring powders or solvents).